
Introduction
Retaining walls are a crucial element in landscaping, serving both functional and aesthetic purposes. They are used to hold back soil and create level surfaces on sloped terrain, preventing erosion and providing structural support to landscapes. While there are various materials available for constructing retaining walls, cultured stone has gained popularity in recent years due to its durability, versatility, and aesthetic appeal.
In this comprehensive guide, we will explore the benefits of using cultured stone for retaining walls, discuss design considerations, and provide step-by-step instructions for the installation process. Whether you are a homeowner looking to enhance your outdoor space or a landscaping professional seeking to expand your repertoire, this guide will equip you with the knowledge and skills to create stunning and durable cultured stone retaining walls.
Benefits of Cultured Stone Retaining Walls
Cultured stone, also known as manufactured or faux stone, is a man-made material that replicates the look and feel of natural stone. It is made from a mixture of cement, aggregates, and pigments, molded into various shapes and textures to mimic the appearance of natural stone. While cultured stone may not have the same geological composition as natural stone, it offers several advantages that make it an attractive choice for retaining walls:
1. Cost-Effective: Cultured stone is more affordable than natural stone, making it a budget-friendly option for homeowners and landscapers looking to achieve a high-end look without breaking the bank. The lower cost of cultured stone does not compromise on quality or durability, making it a practical choice for retaining walls.
2. Variety of Styles and Colors: Cultured stone is available in a wide range of styles, colors, and textures, allowing for endless design possibilities. Whether you prefer the rustic charm of stacked stone or the sleek elegance of cut stone, there is a cultured stone option to suit your aesthetic preferences and complement your landscaping design.
3. Lightweight and Easy to Install: Cultured stone is lighter in weight compared to natural stone, making it easier to handle and install. This can save time and labor costs during the construction process, especially for DIY enthusiasts or small landscaping projects. The lightweight nature of cultured stone also reduces the need for heavy machinery, simplifying the installation process.
4. Durable and Low Maintenance: Cultured stone is highly durable and resistant to weathering, fading, and erosion, ensuring that your retaining walls will stand the test of time. Unlike natural stone, which may require sealing or periodic maintenance, cultured stone is low maintenance and retains its color and texture over the years with minimal upkeep.
5. Eco-Friendly: Cultured stone is an environmentally friendly choice for retaining walls, as it reduces the demand for natural stone quarrying and minimizes the environmental impact of stone extraction. By opting for cultured stone, you can create a sustainable landscaping solution that enhances the beauty of your outdoor space while preserving natural resources.
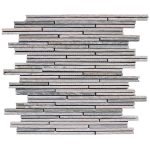
veneer stone for Cultured Stone Retaining Walls
When designing cultured stone retaining walls, it is essential to consider various factors to ensure both functionality and aesthetics. Here are some key design considerations to keep in mind:
1. Height and Slope: The height and slope of the retaining wall will influence the design and construction requirements. Taller walls may require additional reinforcement, such as geogrids or concrete footings, to provide structural stability and prevent bowing or collapse. The slope of the terrain will also affect the angle of the retaining wall and the type of drainage system needed to manage water runoff.
2. Drainage: Proper drainage is crucial for the longevity of retaining walls, as water accumulation can exert pressure on the wall and lead to erosion or failure. Incorporating drainage features, such as weep holes, gravel backfill, and French drains, will help redirect water away from the wall and prevent hydrostatic pressure buildup behind the wall.
3. Backfill Material: The type of backfill material used behind the retaining wall is important for providing support and stability. Compacted gravel or crushed stone is commonly used as backfill material, as it allows for proper drainage and prevents soil erosion. Ensuring proper compaction of the backfill material is essential to avoid settlement or shifting of the retaining wall.
4. Aesthetics: Cultured stone retaining walls offer endless design possibilities, allowing you to customize the look and feel of your outdoor space. Consider the architectural style of your home, existing landscaping elements, and personal preferences when selecting the style, color, and texture of the cultured stone. Mixing and matching different stone styles can create visual interest and add dimension to the retaining wall design.
5. Curves and Corners: Incorporating curves and corners into the design of cultured stone retaining walls can soften the overall appearance and create a more organic and natural look. Curved walls can also help to distribute pressure more evenly along the wall, reducing the risk of structural failure. Pay attention to the radius of curves and the alignment of corners to ensure a seamless and visually appealing finish.
Installation Process of Cultured Stone Retaining Walls
Now that we have covered the benefits and design considerations of cultured stone retaining walls, let's delve into the step-by-step installation process:
1. Site Preparation: Before starting the installation, assess the site conditions and ensure proper site preparation. Clear the area of debris, vegetation, and any obstacles that may hinder the construction process. Mark the layout of the retaining wall using stakes and string lines to establish the wall's alignment and dimensions.
2. Excavation: Excavate the area where the retaining wall will be constructed, ensuring that the base is level and compacted. The depth of the excavation will depend on the height of the wall and the type of soil conditions. Dig a trench for the base course of the retaining wall, making sure to account for the thickness of the base material and the first row of stones.
3. Base Course Installation: Start by laying the base course of the retaining wall, using a level to ensure proper alignment and stability. Apply a layer of compacted gravel or crushed stone as a base material to provide support and drainage behind the wall. Use a hand tamper or plate compactor to compact the base material and create a solid foundation for the retaining wall.
4. Cultured Stone Placement: Begin placing the cultured stone units on the base course, following the design layout and pattern you have chosen. Apply a generous amount of mortar to the back of each stone unit before placing it on the wall, ensuring a secure bond. Use a trowel to spread the mortar evenly and remove any excess to achieve a clean finish.
5. Cutting and Shaping: If necessary, cut or shape the cultured stone units to fit the desired dimensions and angles of the retaining wall. Use a wet saw or masonry chisel to make precise cuts and adjustments, taking care to maintain the integrity of the stone's texture and appearance. Plan ahead and measure carefully to minimize waste and ensure a seamless installation.
6. Vertical and Horizontal Alignment: Check the vertical and horizontal alignment of the cultured stone units as you build the retaining wall, adjusting as needed to maintain a straight and level finish. Use a level and string line to ensure that the wall is plumb and straight, making minor adjustments as you progress to achieve a professional-looking result.
7. Mortar Joints: Fill the mortar joints between the cultured stone units with mortar to create a cohesive and seamless appearance. Use a pointing trowel to press the mortar into the joints and smooth out any excess to create clean and uniform lines. Allow the mortar to cure according to the manufacturer's instructions before proceeding to the next course.
8. Building Additional Courses: Continue building additional courses of cultured stone on top of the base course, staggering the joints and alternating the stone patterns for structural stability and visual interest. Take care to maintain consistent spacing between the stone units and ensure proper bonding with the mortar to create a strong and stable retaining wall.
9. Capstones Installation: Finish the top of the retaining wall with capstones or coping stones to provide a decorative and functional cap that protects the wall from moisture and weathering. Select capstones that complement the style and color of the cultured stone units, ensuring a cohesive and polished finish to the retaining wall design.
10. Final Inspection and Cleanup: Once the cultured stone retaining wall is complete, inspect the wall for any gaps, cracks, or uneven areas that may require touch-ups or adjustments. Clean the surface of the wall with a damp sponge or brush to remove any excess mortar or debris, ensuring a clean and professional finish. Step back and admire your work, knowing that you have created a durable and beautiful retaining wall that will enhance your outdoor space for years to come.
Conclusion
Cultured stone retaining walls offer a versatile, cost-effective, and visually appealing solution for landscaping projects of all sizes. Whether you are looking to create a functional retaining wall to prevent erosion or enhance the aesthetic appeal of your outdoor space, cultured stone provides a durable and customizable option that can elevate the beauty and functionality of your landscape design.
By considering the benefits, design considerations, and installation process outlined in this guide, you can confidently undertake the construction of cultured stone retaining walls with the knowledge and skills needed to achieve professional results. Whether you are a seasoned landscaper or a DIY enthusiast, the versatility and durability of cultured stone make it a practical choice for creating stunning and long-lasting retaining walls that will enhance the beauty and value of your property.